Monday, June 14, 2010

artistic expressionism


Much to everyone's surprise we decided to paint our apartment with actual colours instead of the usual safe white or cream that most tend to run with. The colour scheme is pretty much grey and white. We used Nippon Parma for the lounge-hallway-kitchen and a darker grey for the bedroom. It's all about creating a mood. If you look at any interior designer's portfolio you will see that white or cream walls are rarely featured, and having a 'designer' look is what we are trying to encapsulate. Some may think it is too dark, but we believe the walls will look striking once it is furnished.The white glossy skirting borads, window sills and doorframes will contrast and give the apartment more depth. 

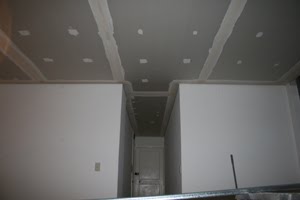
3 coats plus a sealer on the ceiling, and two coats on the walls = very tired arms!!! This is a hard gig so kudos to all the professional painters out there. Another difficulty was paining the up in the shadow line neatly, but we managed in the end. And we are glad we decided to take the risk because it looks awesome.

ceiling the deal


The gyprock was delivered and installed the very next day. It was all up in 24hrs, then two days to sand it all back and finish it off. It's hard to see in the photos but we decided on having a 'shadow line' finish, which basically means it looks as though the ceiling is 'floating'. It looks really good, clean and modern. Now to drill the holes for the downlights and give it a few licks of paint.

how to grout


The grout is added to finish the tiles and thankfully it is not as tedious as laying the tiles themselves. Once it starts to dry, just wipe off with a wet rag until they come up all shiny and nice. Easy. Except it still took about 3 hours, but we also had to 'cut and paste' a few random tiles here and there in that time. Hmmm, this reno business is hard work.

Wednesday, June 2, 2010

tiles

In keeping with our black grey white colour scheme, we set off looking for some tiles for the kitchen and balcony. We essentially wanted the two to be of the same colour, so that the apartment wouldn't look too mis-matched. Being in two different parts of the apartment, we wanted to tie the two together visually, and so we thought we would look for a tile that came in two different finishes - polished for the kitched and a honed (matte) for the balcony. 

It was not as easy as we thought. Most tiles have slight grains, veins or patterns and we wanted a flat medium grey because the stone benchtops and marble splashback have enough texture in them already.After browsing a few stores we had almost given up for the day and headed for the car when out of the corner of my eye I spotted it. A big sign that said SALE, and underneath, a big pile of grey tiles in exactly the style we were looking for. We bought 600mm x 600mm for the kitchen in polished, and 300mm x 300mm for the balcony. 7sqm each. Parma from Hardware and General.


Tiling is not an easy job, particularly if you've ripped out a previous kitchen and used a jackhammer on the ground to remove tiles stuck on with 35yr old glue. We already poured levelling concrete but that is only to make it easier, not make it perfectly flat. So when it came time to lay the tiles we encountered a few problems. Keeping all four corners flat the the cement is very hard on an uneven surface. But we got there in the end, and after taking a second look, it actually came up pretty well. Here's hoping the balcony will be easier.